Antec DF700 FLUX Mid-Tower Chassis Review
Antec's new DF700 FLUX is one of the most highly rated mid-tower computer cases at TweakTown ever. Join us and find out why.

The Bottom Line
Introduction, Specifications, and Pricing
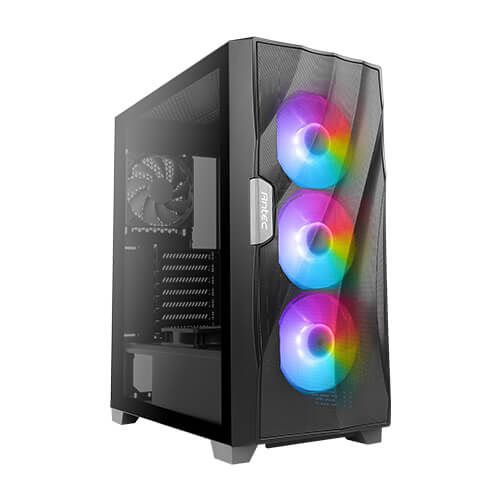
What we have for you today is another chassis from the Dark Fleet series of cases from Antec, with just a touch of déjà vu mixed in with it. Not only is this chassis part of the Dark Fleet group, but it also carries the moniker of FLUX, which stands for flow and luxury. Knowing that the math is pretty simple to conclude that Antec not only wants a chassis to breathe so that it can take on the newer, hotter running components, but that it also comes with just about anything one would desire to find in a mid-tower chassis.
In this instance, Antec accomplishes the former by opening up the chassis with mesh in the front, allowing for any air that passes across the front of the chassis to be sucked into it to cool the components behind those fans. Not only that, Antec fills the chassis with plenty of fans to get you started. The whole goal with the chassis we have for you is to be one of the best cooling mid-towers on the market, and to do so; they have incorporated many hidden details that make this quest possible. However, we mentioned "a touch of déjà vu." That comment is because once we had a closer look, we found this to be the P10 with changes here and there, but all of the steel bits of chassis are identical to what we saw when reviewing the P10 FLUX.
The DF700 FLUX that we have for you now is the best of the bunch that we have seen from Antec in quite some time. With nearly a half dozen fans to move air through the chassis, it comes well ventilated, and more than half of the fans offered are ARGB supported. From what we recall of the P10 FLUX, there was a lot to like in that design, but a closed-off front to the chassis may look stunning, but quite commonly, it tanks thermal performance. By Antec's admission, the idea here is taking this mid-tower solution to the next generation, ready to take on whatever the newest CPUs and GPUs deliver off in heat. We cannot fault Antec for using an older interior and beefing it up to meet demand, as this happens industry-wide. However, in this review, with all features pointing towards top-tier performance, it has to deliver. We are here to see how well it stacks up and provide you with a much better-looking version of the P10 FLUX, with the DF700 FLUX circulating currently.
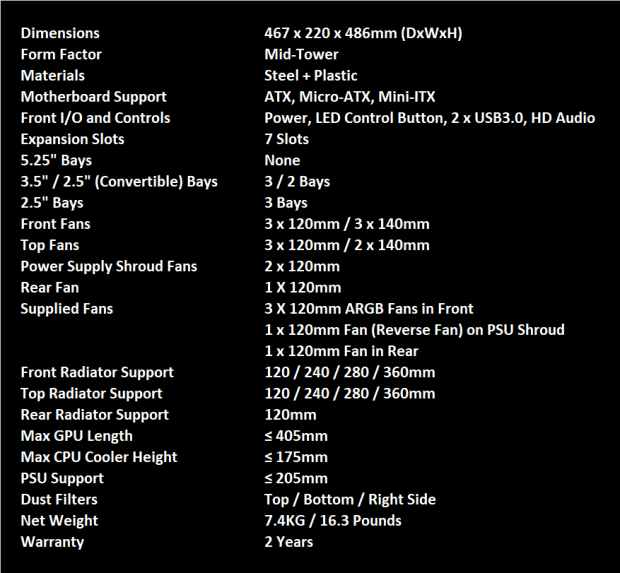
The chart we have is derived from the product page of the DF700 FLUX but done in a way that you do not have to scroll for three pages to read it all. In it, dimensions come first, where we see that the chassis is 486mm tall, it is 220mm wide, and it is 467mm from front to back. Antec denotes weight at the bottom of the chart, where we find it is 16.3 pounds when empty. As we have mentioned, the DF700 FLUX is a mid-tower chassis and is shown to be made of steel and plastic, but with no mention of the 4mm thick tempered glass panel that adorns the left side of the chassis. As designed, the DF700 FLUX can accommodate ATX, Micro-ATX, and Mini-ITX motherboards; it comes with seven expansion slots, and three locations for 3.5" drives, and three locations for 2.5" drives. Externally, you will also find a power button, and an LED control button, a pair of USB 3.0 ports, a couple of HD Audio jacks, and dust covers for the USB ports, and 3.5mm jacks.
Cooling support inside of the DF700 FLUX is quite robust for a mid-tower. The front of the chassis can support a trio of 120mm fans or a set of three 140mm fans. The top is similar to the support of three 120mm fans, but just two 140mm fans fit this time. The back of the chassis has room for a single 120mm fan, and the PSU shroud can house another pair of 120mm fans. Supplied in the chassis are a set of three ARGB 120mm fan running down the front of the DF700 FLUX. There is a 120mm fan at the back, which is not LED lit in any way. Nor is the reverse flow fan Antec ships for the PSU shroud, but another 120mm fan is added into the mix. Radiator support is similar to fan support but not identical.
The front of the chassis can hold a 120, 240, 280, or 360mm radiator, but not a 420mm radiator. Also, something to know here is that if you put the fan behind the bezel, outside of the chassis, these radiators can be 55mm thick. If the fans are installed inside the chassis, Antec states that radiators are then limited to 30mm in thickness. The reality there is; it all depends on the size of the radiator, its location in the front of the chassis, and how long of a GPU you plan to use. There is some wiggle room. The top of the chassis can support a 120, 240, or 280mm radiator, and the back of the chassis can also support a 120mm radiator if desired.
From what we can recall off the top of our heads, the P10 FLUX was somewhere around the $80 mark when it was released, and with the additions that Antec added to the DF700 FLUX, we would likely need to shell out a bit more to obtain the latter. If you shop at Amazon when you see that $96.71 is the lowest price through a third-party retailer, things do not seem that bad. But then reality hits as we cross-check that cost. At Newegg, we see that Antec set the MSRP at just $79.99, and it is currently on sale for $74.99.
At $80, we do feel you get a ton of love from Antec in the DF700 FLUX. If the marketing associated with this chassis rings true, Antec could very likely have a killer product in their lineup that will make other manufacturers notice it.

Packaging
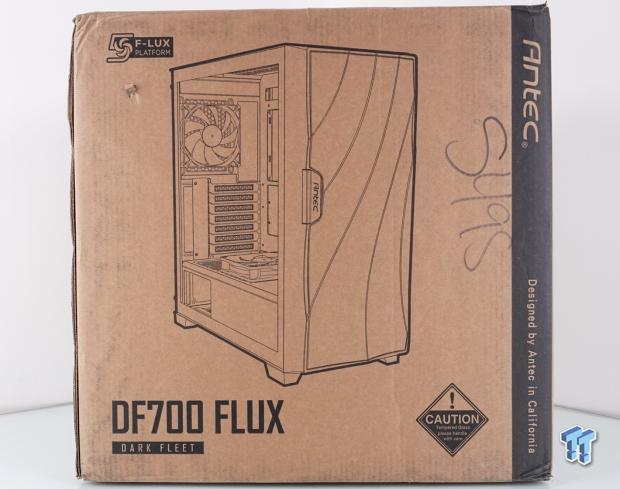
This is not a color issue with the camera; Antec has chosen a darker, more orange cardboard to encase their cases. On the front of it, there is an icon at the top-left, noting the 5-fan F-LUX platform, and next to it is a rendering of the chassis found inside of the box. The name of the chassis is located at the bottom, where we also see a cautionary notification to the inclusion of a glass panel, and Antec uses the right side of the panel to display their name and where all of their designs originate.
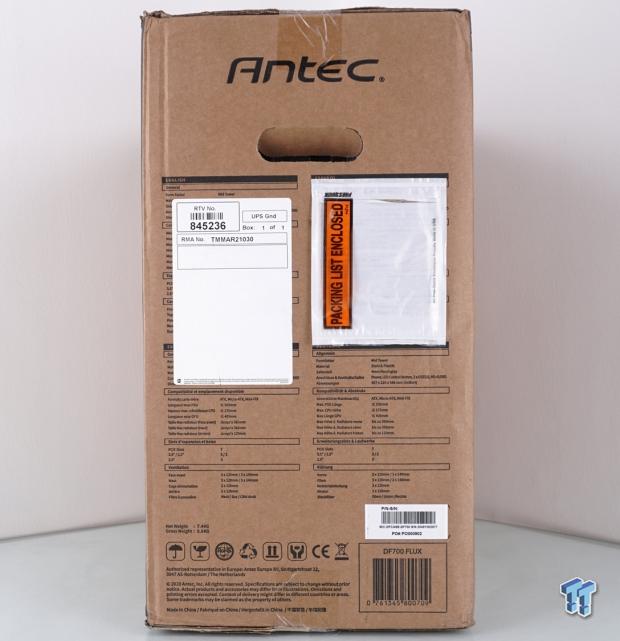
As we spin the box to the left, we can see the right-side panel of the packaging, which is topped with the Antec name. Under the shipping stickers, there are four sets of specifications in various languages, so that brick and mortar customers can see what they are buying. We also see the weight and the sticker with the model and serial numbers on it, with some legal information printed below them, at the bottom of the panel.
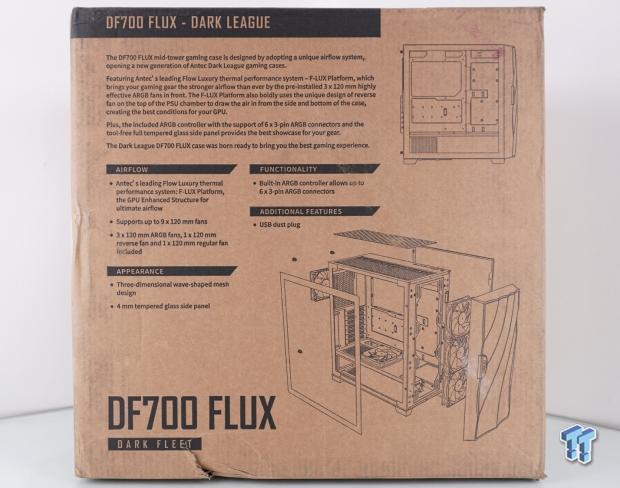
At the back, Antec starts with an explanation of what goes into making the DF700 FLUX and then moves into features in airflow, appearance, functionality, and additional features. At the top, a small rendering gives an interior view, while the larger rendering is an exploded view of the chassis, showing all of its components.
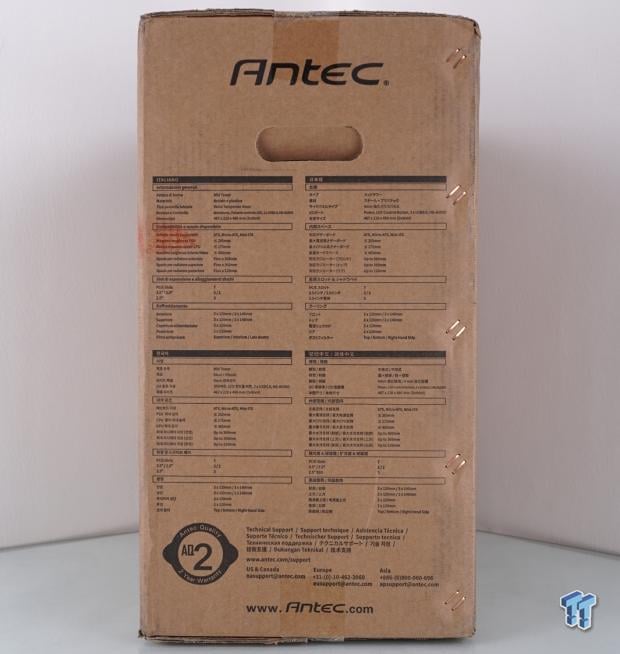
The left side of the box is similar to the right-side panel, but the specifications are delivered in another four languages to cover Antec's markets. However, at the bottom, we see the AQ2 icon for the warrant support, and to the right of it are addresses and phone numbers for technical support.
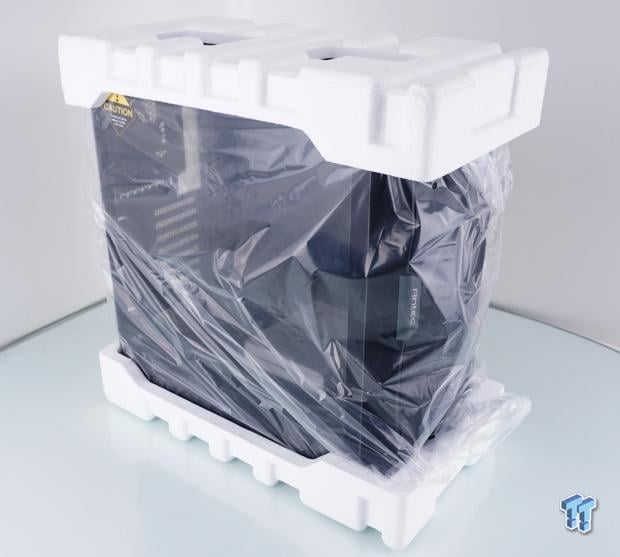
The box took a few hits on its way to our porch, yet the chassis inside is in perfect condition. Antec's success is due to the use of Styrofoam caps that took the brunt of the impacts, while the plastic liner ensured the surfaces of the chassis did not get abraded. The last level of protection is found on the tempered glass door, where both the inside and the outside are covered with plastic, making sure the glass is unblemished as well.
Antec DF700 FLUX Mid-Tower Chassis
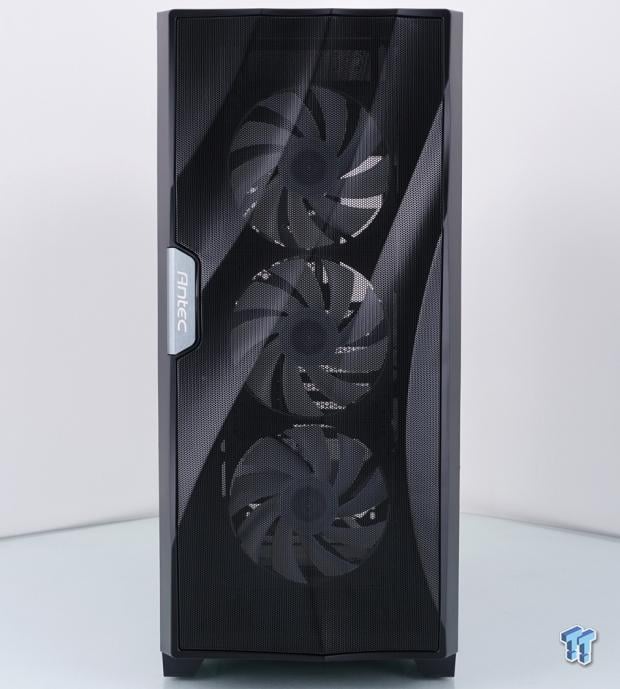
The DF700 FLUX comes with what Antec calls a three-dimensional wave-shaped mesh for a smooth and minimalist look. Smooth is it's not, cool-looking, sure, and definitely wave-shaped. Either way, we love the contrast of how the lights play with the wave mesh panel, and even the bezel carries the shapes beyond just the mesh. We also see a bold use of gray at the left, where the Antec name has been painted on a section of brushed aluminum.
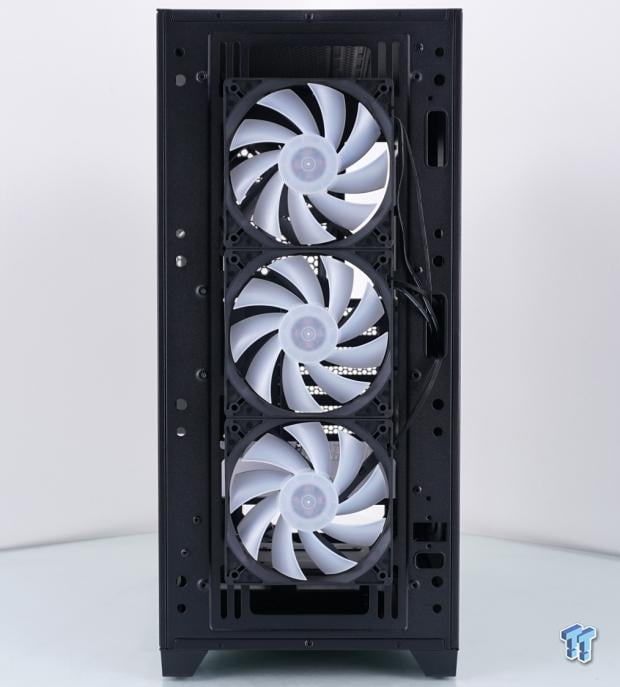
We removed the bezel to look behind it and see that Antec has installed three 120mm ARGB fans onto the face of the chassis and not behind the steel. Doing so offers much more interior space. The wiring is clean and hidden inside the chassis, but sadly, there is no dust filter here, only the mesh in the bezel. However, with nothing attached to the front bezel and waterproof materials, there is no reason it can't be pulled off and run under a faucet for quick cleaning.
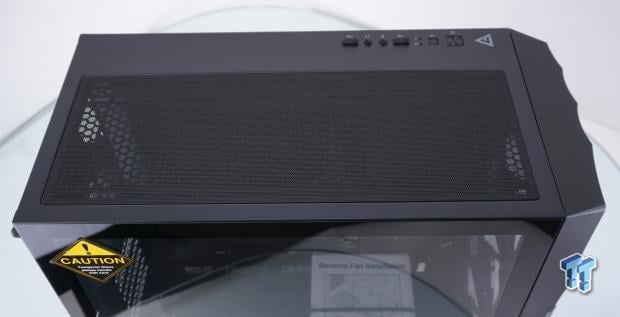
The view from above the Antec DF700 FLUX shows us three things. We can see the shape of the bezel and how thick it is to allow fans outside the case. Second, while out of focus at the moment, we do see the front I/O panel on the right side of the chassis, near the front. The third thing to see is that the area used for cooling is pushed to the left side, allowing for clearance to the motherboard and RAM when installing water cooling.
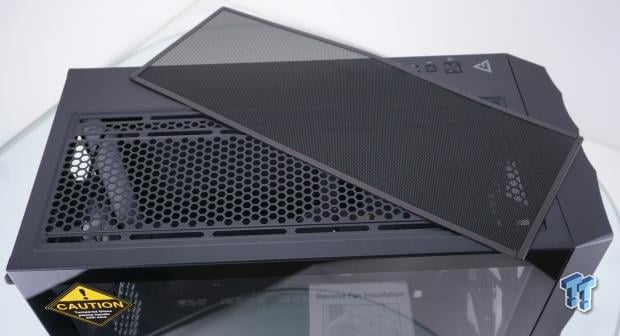
The dust filter on the top of the chassis is magnetically attached and does not deform when fans or radiators are installed into the grooves seen below the filter. Notice that there are three rails for installation, but both the 120mm and 140mm mounting are both started as far away from the motherboard as possible.
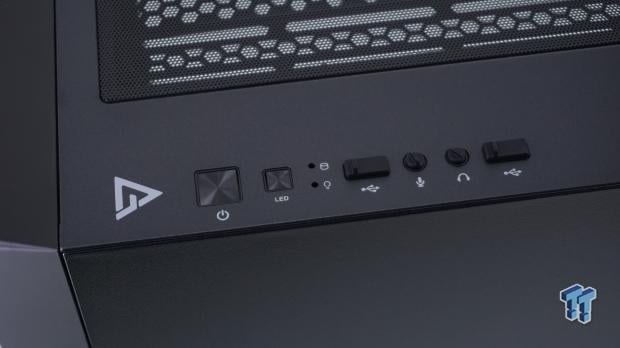
On the right side, near the front of the chassis, is where the front I/O panel resides, allowing all of its internal wiring to land behind the motherboard tray. Starting with the Antec logo, we see it is followed by the power button and a LED control button delivering an astonishing fifty options at the press of a button. There is a red LED for the HDD activity and white to denote the PC power, followed by 3.5mm jacks for HD Audio, with a USB 3.0 port on either side, all of them with dust covers in place.
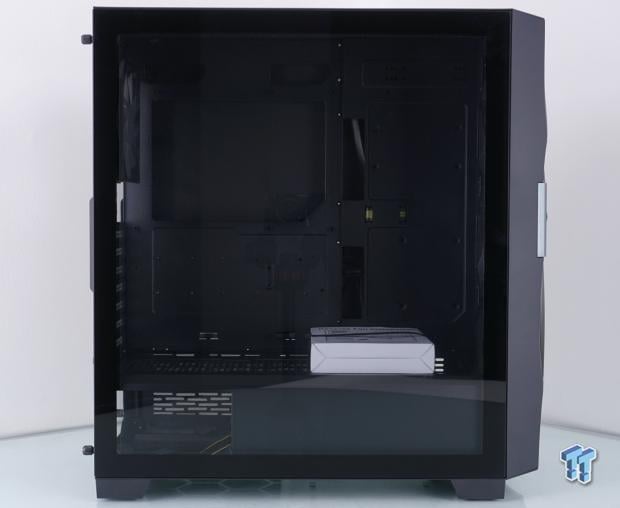
The left side of the chassis offers a view of the front bezel to the right, and the rest of the view is of the tempered glass side panel, minus the feet at the bottom and the screws at the back. To keep users from looking at the steel frame behind the glass, Antec opted to paint the edges to eliminate that. We are left with an unimpeded look inside, with just the slightest amount of tint in the glass.
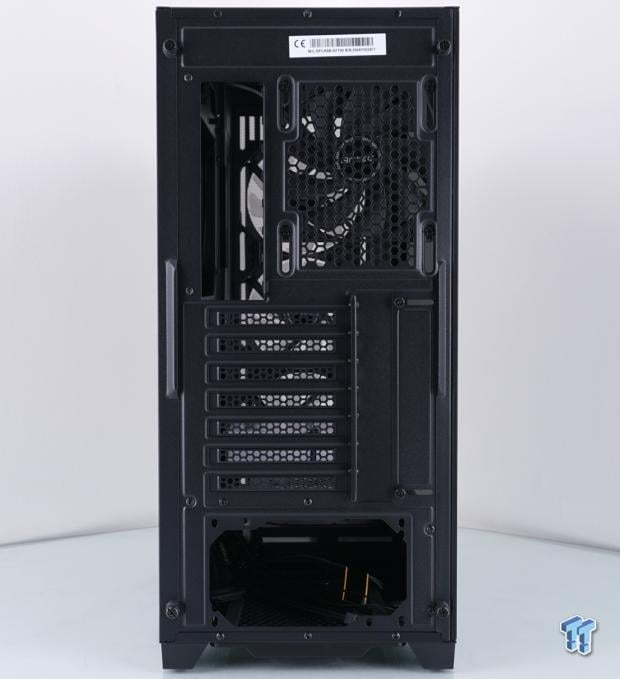
The back of the chassis starts with a gap at the top to allow more room for cooling before we run into the rear I/O opening and the adjustable 120mm exhaust fan to the right of it. We then see the seven expansion slots with ventilated covers, with a slide-plate style setup to cover the opening used to install cards. The bottom houses the PSU, and we can see that the PSU has to be installed through the right side of the chassis.
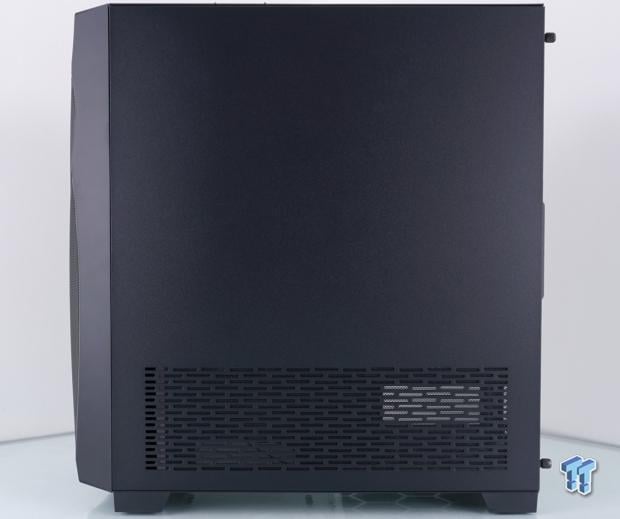
Many manufacturers will slap on a solid steel door to the right side of any chassis; Antec took the opportunity to allow for another means of intake airflow. With the use of the reverse flow fans on the PSU shroud, it only makes sense to give them access to fresh air rather than to make them redirect air from the front of the chassis.
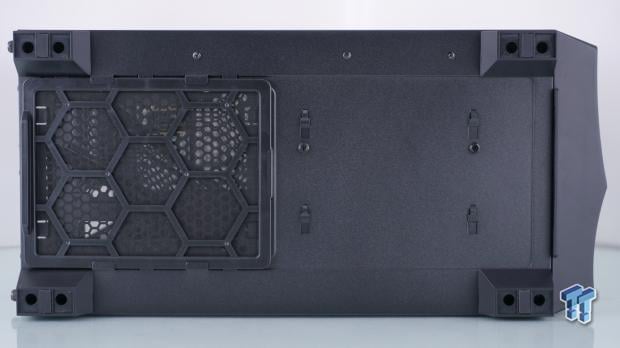
Under the chassis, we can see the chunky feet supported with just a sliver of rubber in the middle of each foot. The back of the chassis has a PSU dust filter that can slide out the back of the chassis, and in front of that, we see the locking tabs and a pair of screws that secure the removable HDD cage at this time. Remove the screws, slide the cage to the right side of the chassis, and it will come out.
Inside the DF700 FLUX
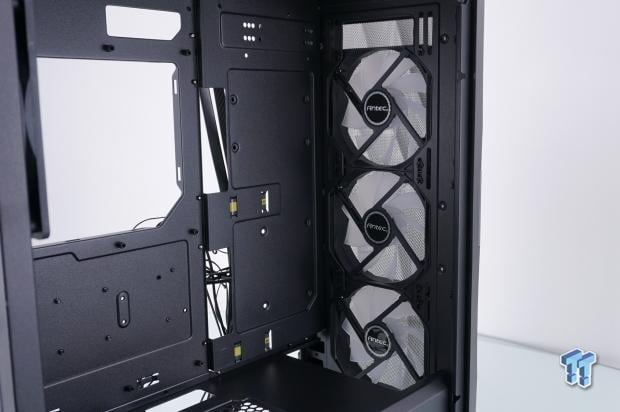
When we first removed the bezel, we mentioned that the fans were installed outside of the chassis, and doing so offers more interior space, but with the notch out of the PSU shroud, we can get much thicker radiators inside of the chassis this way. While some tooling is left for a 5.25" bay at the top, none is offered in favor of room for cooling support.
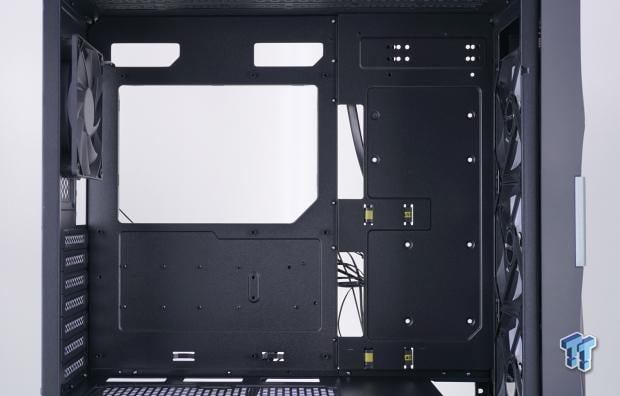
The motherboard tray starts, at the top, with a pair of holes for wires at the left and holes to the right, which is leftovers, but could be used for wire management if needed. The motherboard sits low and left, with a massive opening for CPU cooler access, which is also used to deliver much of the cable management. The area at the far right in the tray is used for drive storage, with a pair of openings for wires to pass through, and we can even see bits of Velcro straps run through the tray.
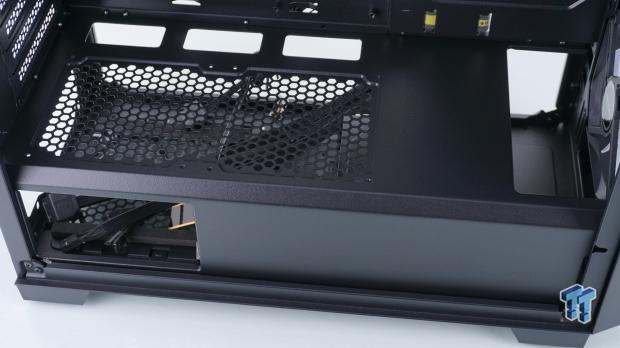
The PSU shroud covers the bulk of the bottom of the case. At the top of it, there are three holes near the motherboard tray for wires to pass, while in front of those are a pair of fan placements, which are designed to pull air from the bottom into the main chamber, and we get another look at the gap near the front for radiator clearance. The corner is angled as it moves from the top to the side, and at the back of the side section is an opening to allow the PSU sticker to show through.
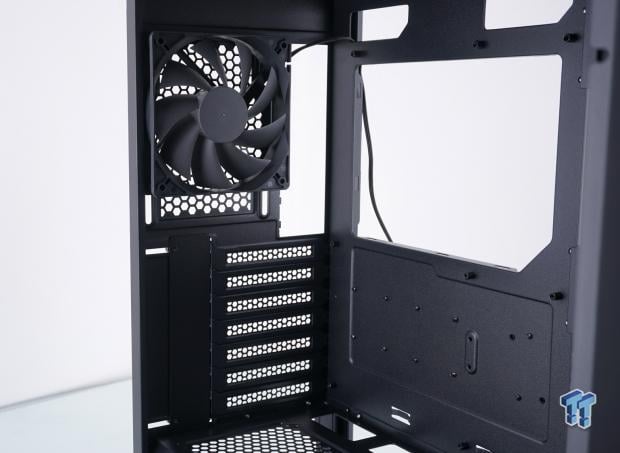
At the back of the chassis is fan number four in the DF700 FLUX, but it is a plain model with no LED support. It is height adjustable to either cool the VRMs or lowered to evacuate more CPU cooler exhaust. As to the seven expansion slots, the covers are replaceable. While individually screwed into place, there is a slide-cover to fill the open void needed to install an expansion card.
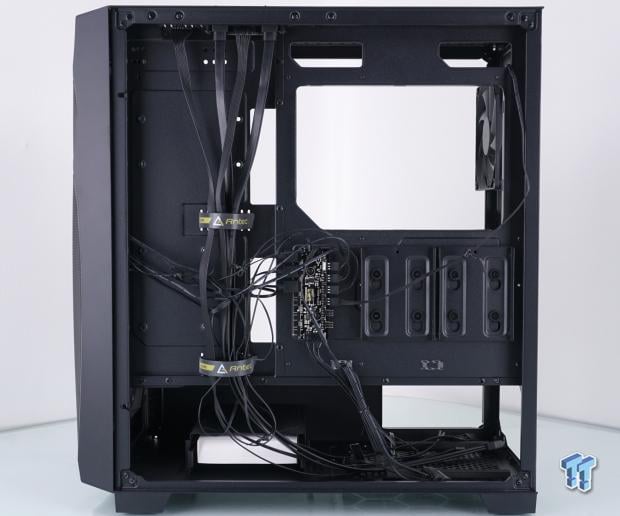
We immediately noticed that no time is paid to the wiring from Antec, it is all strewn about, but at least all of the fans are correctly connected. At the left, you will have a maximum of 27mm of depth, while the right side is 20mm deep. The bottom of the case is wide open and is also where we found the hardware box, riding in the HDD cage.
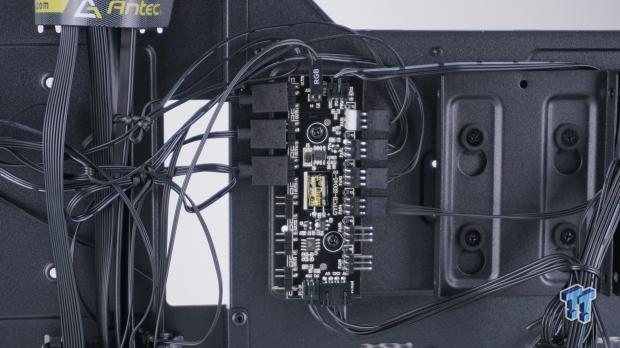
Antec provides a PWM fan hub with ARGB support to keep all of the chassis fans in sync. As we mentioned, the chassis offers fifty modes for the fans, but the hub also provides the choice to connect it to a motherboard for ARGB support. The hub will support up to six fans, controlled via the motherboard but powered via the PSU.
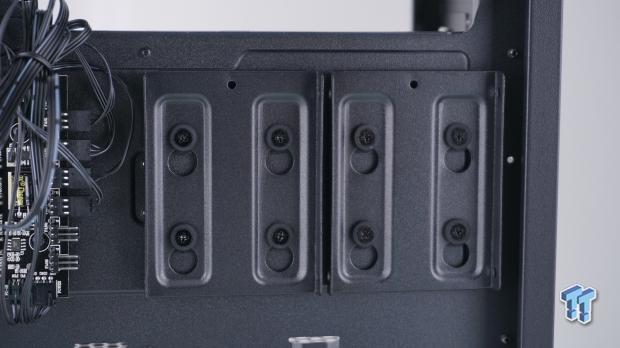
Two of the three SSD locations are contained just below the CPU cooler access hole and come in the form of trays. These trays are connected with rubber grommets that allow the trays to be pushed upwards and removed once the slots open wide enough to enable the grommets to pass through them.
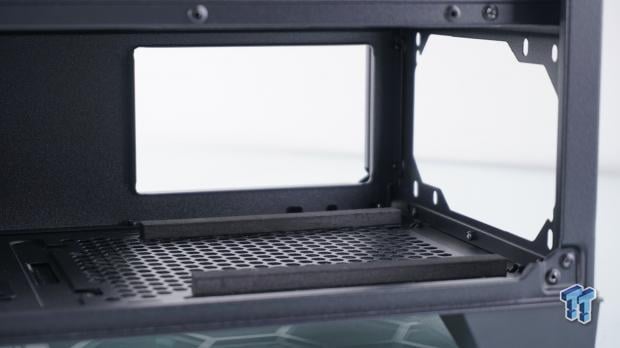
To install the PSU, you must slide it under the PSU shroud from the right side of the chassis. Once that is done, and it is resting on the thick foam pads on the bottom of the case, it gets screwed into the back of the chassis. The maximum length is 205mm for the PSU, but that all depends on what we see in the following image.
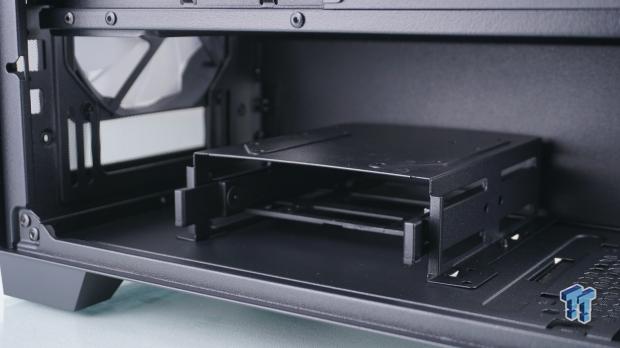
Along with the holes in the motherboard tray, the tray in this HDD cage is the third location for a 3.5" drive, for a total of three locations. The top of the cage has holes for a 2.5" drive to mount to it, but so does the tray inside, which makes a total of four locations for 2.5" drives if 3.5" drives are not placed here. Also, the PSU length limit depends on this being used. If one were to remove it, any mainstream PSU would fit.
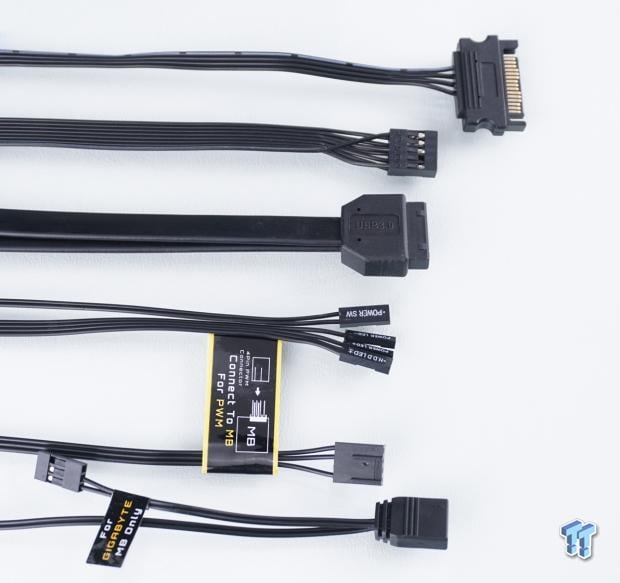
When it comes to the chassis wires, they are long enough to be used correctly but with enough slack to be wire managed. From top to bottom, we have the STAT power lead to power the fan hub, the HD Audio cable, the native USB 3.0 cable, the front panel connections for the power button, and activity LEDs. At the bottom is the 4-pin PWM connection that the fan hub needs to send a signal to the fans connected to it, and at the bottom is the ARGB connection with a unique tail for GIGABYTE motherboards.
Accessories and Documentation
Installation and Finished Product
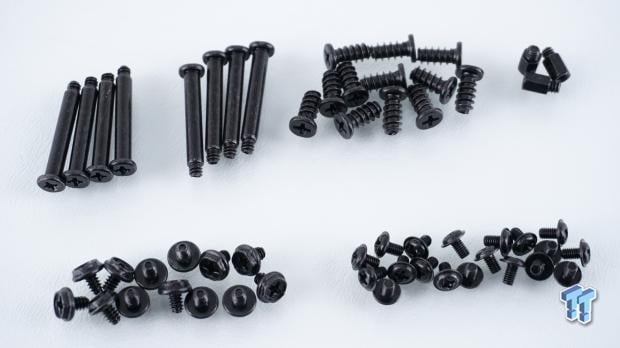
We found in the HDD tray in the white hardware box that we opened a sealed pack of screws from and sorted them by size. At the top, we have eight fan screws used to attach reverse flow fans to the PSU shroud. We are also set a set of twelve standard fan screws to be used in any of the various locations. The last bits in the top row are an extra set of three standoffs, although nine of them are already installed in the motherboard tray. The bottom row offers thirteen hex-head 6/32 screws for the PSU and HDD installation, while there are nineteen M3 screws for securing the motherboard and any 2.5" drives.
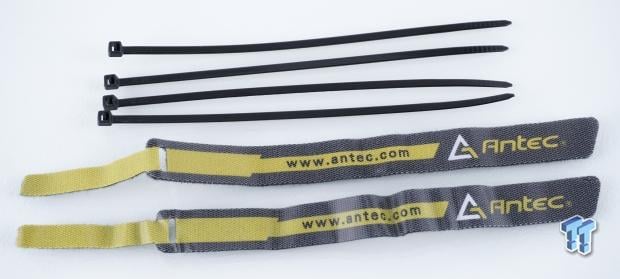
To aid in wire management, Antec sent over four beefy zip-ties to be used at your discretion. Antec also sends another pair of Velcro tie straps to go along with the pair installed on the motherboard tray. While these may not have defined tie points on the motherboard tray, they will work wonders for grouping wires from the PSU or whatever else you may see them fit to be used on.
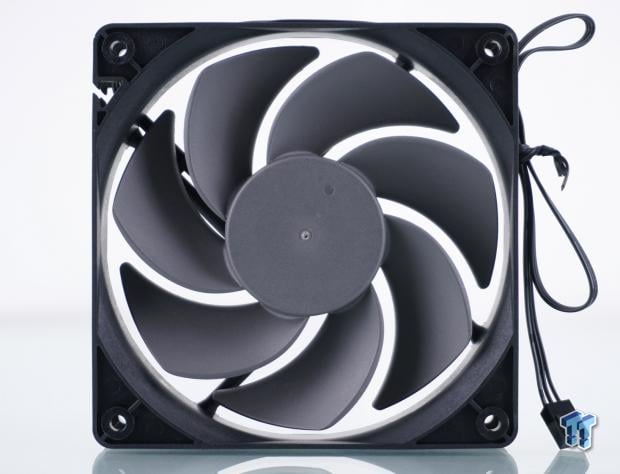
In a white box zip-tied to the top of the PSU shroud, we found the fifth fan of the DF700 FLUX, which happens to be what we are looking at now. Unlike an average fan, this fan offers a reverse flow, which means as the fan frame rests on the PSU shroud, the open end we see now is the exhaust. The fan is 3-pin powered like all other chassis fans, and like we did with the rear chassis fan, we connected this to the fan hub.
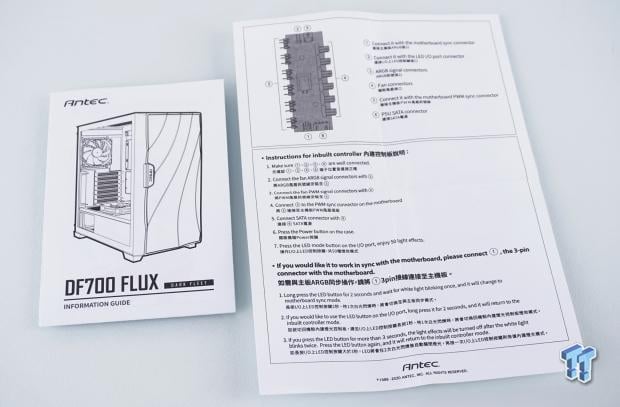
The information guide at the left unfolds vertically once and horizontally three times to expose eight panels on either side. The first four panels look at renderings of the chassis from all sides, and then things move into opening the chassis and assembly. Once done with the assembly, we find a mention of the ARGB PWM fan hub. To ensure the hub is connected correctly, we move to the insert. At the top of it, we see the hub with numbers pointing things out with descriptions to the right of what they are. The lower half explains what needs to be connected where and allowed us to get ours up and running without any issues.
Test System, Installation, and Finished Product
- Motherboard: ASUS ROG DARK HERO (AMD X570) - Buy from Amazon
- CPU: AMD Ryzen 5 3700X - Buy from Amazon
- Memory: Team T-Force XTREEM ARGB 3600MHz 2X8GB
- Graphics Card: NVIDIA GeForce RTX 3070 FE - Buy from Amazon
- Storage: SanDisk SDSSDXP120G SSD
- Case: Hydra Bench Standard
- Power Supply: ASUS ROG Thor 850W - Buy from Amazon
- OS: Microsoft Windows 10 Home 64-bit - Buy from Amazon
- Software: AMD Ryzen Master, AIDA64 Engineer 6.32.5600, and CPU-z 1.94.0 x64
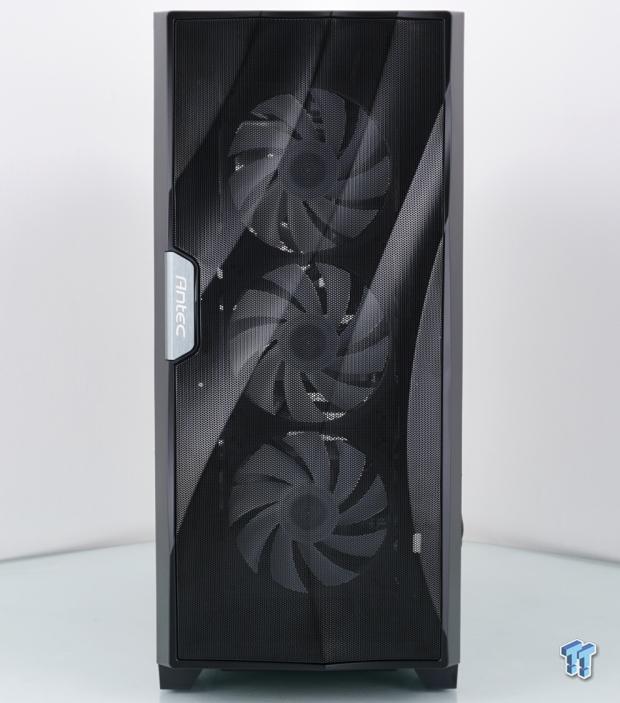
Once everything was installed into the DF700 FLUX, the shadows viewed through the front may be slightly different, but at the end, we still get that massive open mesh front. Regardless of the waves, which we like more and more every time we look at it, this chassis looks just as good now as it did when we first saw it.
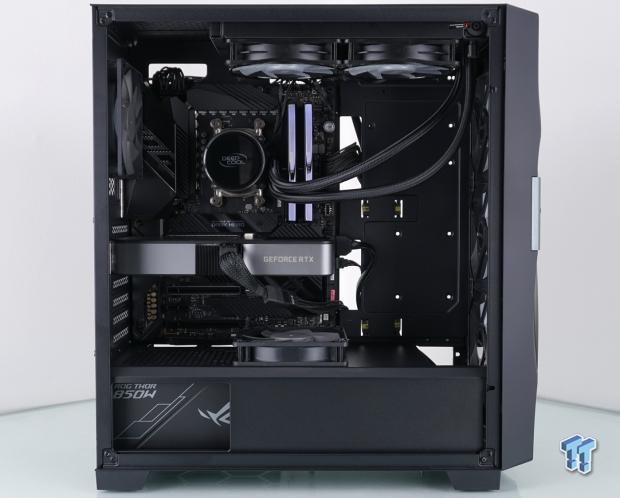
Inside the DF700 FLUX, we installed the AIO at the top with plenty of clearance to the motherboard. Depending on the system used, you can even get away with thicker radiators at the top, similar to what is described to fit the front. The motherboard was installed easily, the GPU installed level, and as suggested, we put the reverse flow fan under the GPU in the middle of the PSU shroud. We opted for no spinners in our build, but we tested for fitment, and all is well in that department, although we do like the open space as it is. The last thing to note is that even with the fan down on the PSU, we can still view what PSU is used.
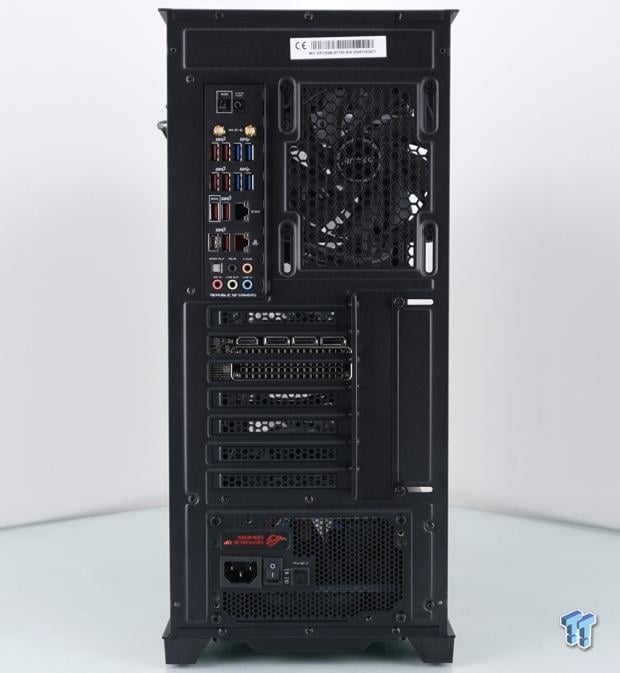
Nothing unexpected reared its head when it came to the back of the DF700 FLUX. The rear I/O aligns well, we had not a single issue fitting the GPU or closing the slide cover, and when it came to the PSU, there are eight mounting holes so that any orientation of the PSU is possible.
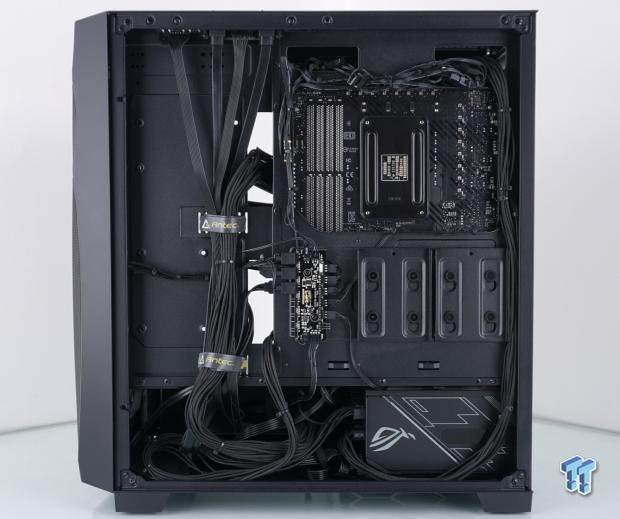
With 27mm of room on the left, we had all the space we needed to bundle the wiring from the chassis and the PSU in the default straps. In the middle, you will find three cutouts on all sides of the CPU cooler access hole and is what we use to tie up the AIO wires at the top, the fan wires on the left, the 8-pin cable on the right, and more fan wires at the bottom. Even with the HDD cage still in place, housing our SSD, we had all the room we need for the PSU and wiring without causing issues anywhere.
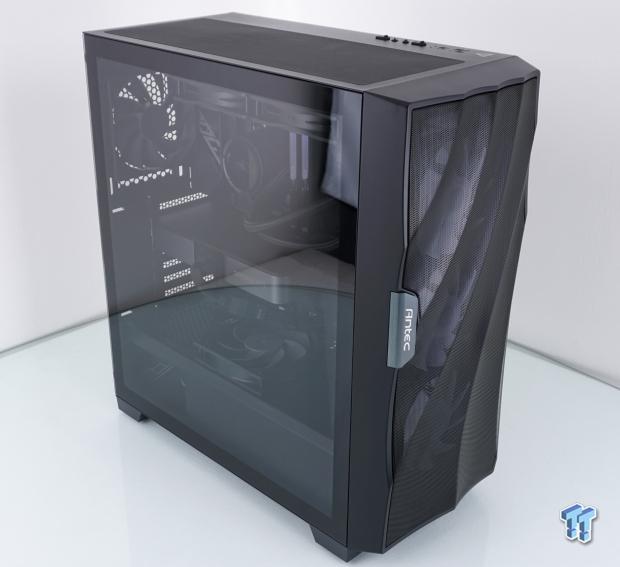
Spun back around, and now with the tempered glass side panel back in place, we find that we love the lack of dark tint on the panel, as even with little light inside, everything is in full view. The body lines are tight, the color of paint on the glass matches the bezel, and even though a bold move, we love the brushed aluminum plate with their name on it.
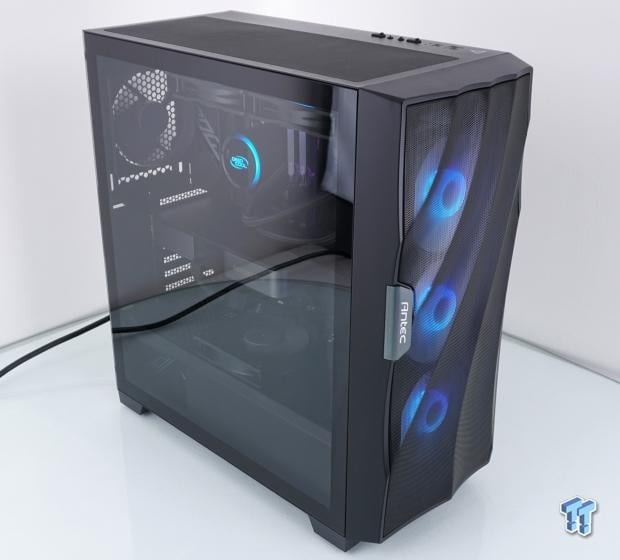
Once you add power and are sure that the system is good to go, it is time to play with the lighting. In this, there are two options simultaneously. The way things are set up, you connect the ARGB cable to the motherboard, and you can still use the LED control button for fifty options. On top of that, you can also go into the motherboard software or some UEFI and tell the motherboard to override the switch, allowing the front chassis fans to match the rest of the system as they are synced together.
Final Thoughts
While at first, we realized that this is a P10 in new clothing, and we were not so sure that Antec made the right call, but boy, were we wrong! While at first, we were not that fond of the wave design on the front, but it has been growing on us, and we appreciate that Antec did something to stand out over another flat front mesh panel. The addition of tempered glass to the side indeed moves the DF700 FLUX into the gaming segment, and in what we have seen in the past, no one, I mean no one, fifty choices in various modes, static colors, and color-shift options. The fact that it came with five fans was not all that impressive, as so did the P10, but the closed-off front on the P10 crippled what this frame is capable of.
Thermally, we had to run the test a couple of times and verify we are looking at things correctly, as the DF700 FLUX turns in some of the best results we have seen in quite some time. The CPU came in with a 0.8°C Δ over our open-air testing, which is damn good in our opinion. We also saw the best VRM temperatures in the DF700 FLUX, where they ran a -6.9°C Δ when compared to running open-air, which should run cooler, but this is the lowest we have seen these VRMs, thermally, in any of our recent chassis reviews.
With the reverse flow fan in place, as recommended, the GPU topped out with a 0.2°C Δ, where many others are a few or more degrees higher in this regard. To say we are impressed is an understatement, and we have yet to deal with the noise level. In the aspect, with the chassis fans controlled via PWM from the motherboard at only 1155 RPM of their 1400 RPM maximum with just 30dB delivered into the room, we cannot complain in this respect either.
On top of top-notch performance levels and esthetics, there are many things left to appreciate when looking deeper. Dust covers on the front I/O ports may not seem like much, but if you have dust in the ports, it can cause issues, but with the DF700 FLUX, we need not concern ourselves. The dust filter under the PSU, the one at the top of the chassis, and the one inside the right door panel can all be easily removed and cleaned. We would have liked to have seen a filter in the front of the chassis, but we have to assume they ran out of room in their quest to allow for fans outside of the steel. Even so, the front bezel can be removed and washed easily, without the hassle of connected wires or any components that cannot deal with some soap and water.
But at the end of it all, the lack of a front filter is the only downside we see. While billed as a mid-tower, it can house anything you want within the specification of the chassis. Keep in mind, you can get away with a longer GPU if you do not use water cooling in the front, and you can have a longer PSU if the HDD cage is removed. Any way you decide to go, Antec and the DF700 FLUX have you covered.
The fact that, if you look around, you can acquire this chassis for less than $100 is impressive, and then to think that we saw it as low as $74.99 at Newegg keeps stacking the points in favor of the DF700 FLUX being your next go-to chassis. There is a vast amount of room inside, with all of the options custom PC builders look for in a mid-tower chassis. In our minds, while aesthetics are not typical, they are good, and even without the front dust filter, we find no glaring reasons not to give the DF700 FLUX from Antec some serious thought when it comes to getting a new case.

Performance | 100% |
Quality | 100% |
Features | 98% |
Value | 100% |
Overall | 100% |
The Bottom Line
Even accounting for the lack of an intake dust filter, the DF700 FLUX averages a perfect score. A standout visually, Antec offers a chassis that has proven itself to deal with whatever sort of heat you can produce.

Related Tags
![Intel shelves Raja Koduri, out of the GPU unit, back to Chief Architect position Intel shelves Raja Koduri, out of the GPU unit, back to Chief Architect position]() Intel shelves Raja Koduri, out of the GPU unit, back to Chief Architect position
Intel shelves Raja Koduri, out of the GPU unit, back to Chief Architect position![Atari hardware revenues down 91% as VCS console significantly underperforms Atari hardware revenues down 91% as VCS console significantly underperforms]() Atari hardware revenues down 91% as VCS console significantly underperforms
Atari hardware revenues down 91% as VCS console significantly underperforms![NVIDIA's purported next-gen TITAN RTX renders: quad-slot GPU, dual 16-pin power NVIDIA's purported next-gen TITAN RTX renders: quad-slot GPU, dual 16-pin power]() NVIDIA's purported next-gen TITAN RTX renders: quad-slot GPU, dual 16-pin power
NVIDIA's purported next-gen TITAN RTX renders: quad-slot GPU, dual 16-pin power![PlayStation's Jim Ryan isn't worried about Xbox Game Pass, but he should be PlayStation's Jim Ryan isn't worried about Xbox Game Pass, but he should be]() PlayStation's Jim Ryan isn't worried about Xbox Game Pass, but he should be
PlayStation's Jim Ryan isn't worried about Xbox Game Pass, but he should be![Final Fantasy 16 will flex the PlayStation 5's power, Yoshi-P says Final Fantasy 16 will flex the PlayStation 5's power, Yoshi-P says]() Final Fantasy 16 will flex the PlayStation 5's power, Yoshi-P says
Final Fantasy 16 will flex the PlayStation 5's power, Yoshi-P says
![TeamGroup T-Create Classic DL 1TB SSD Review - Stalwart DRAMless TeamGroup T-Create Classic DL 1TB SSD Review - Stalwart DRAMless]() TeamGroup T-Create Classic DL 1TB SSD Review - Stalwart DRAMless
TeamGroup T-Create Classic DL 1TB SSD Review - Stalwart DRAMless![Acer Predator GM7000 4TB SSD Review - 4TB of Elite Performance Acer Predator GM7000 4TB SSD Review - 4TB of Elite Performance]() Acer Predator GM7000 4TB SSD Review - 4TB of Elite Performance
Acer Predator GM7000 4TB SSD Review - 4TB of Elite Performance![Cooler Master XG850 Plus Platinum PSU Review Cooler Master XG850 Plus Platinum PSU Review]() Cooler Master XG850 Plus Platinum PSU Review
Cooler Master XG850 Plus Platinum PSU Review![SteelSeries Apex 9 Mini Gaming Keyboard Review SteelSeries Apex 9 Mini Gaming Keyboard Review]() SteelSeries Apex 9 Mini Gaming Keyboard Review
SteelSeries Apex 9 Mini Gaming Keyboard Review![PCCooler GAMEICE CPU Air Coolers (K4, K6, and G6) Review PCCooler GAMEICE CPU Air Coolers (K4, K6, and G6) Review]() PCCooler GAMEICE CPU Air Coolers (K4, K6, and G6) Review
PCCooler GAMEICE CPU Air Coolers (K4, K6, and G6) Review
![Silicon Motion SM2267XT DRAMless Laptop SSD Preview - Speed and Efficiency Silicon Motion SM2267XT DRAMless Laptop SSD Preview - Speed and Efficiency]() Silicon Motion SM2267XT DRAMless Laptop SSD Preview - Speed and Efficiency
Silicon Motion SM2267XT DRAMless Laptop SSD Preview - Speed and Efficiency![NVIDIA GeForce RTX 4080 Unboxed: FE, ASUS, MSI and ZOTAC NVIDIA GeForce RTX 4080 Unboxed: FE, ASUS, MSI and ZOTAC]() NVIDIA GeForce RTX 4080 Unboxed: FE, ASUS, MSI and ZOTAC
NVIDIA GeForce RTX 4080 Unboxed: FE, ASUS, MSI and ZOTAC![NVIDIA GeForce RTX 4090 OC Shootout: ASUS, COLORFUL, FE, MSI, GAINWARD NVIDIA GeForce RTX 4090 OC Shootout: ASUS, COLORFUL, FE, MSI, GAINWARD]() NVIDIA GeForce RTX 4090 OC Shootout: ASUS, COLORFUL, FE, MSI, GAINWARD
NVIDIA GeForce RTX 4090 OC Shootout: ASUS, COLORFUL, FE, MSI, GAINWARD![NVIDIA GeForce RTX 4090 Unboxed: FE, ASUS ROG Strix, MSI SUPRIM LIQUID NVIDIA GeForce RTX 4090 Unboxed: FE, ASUS ROG Strix, MSI SUPRIM LIQUID]() NVIDIA GeForce RTX 4090 Unboxed: FE, ASUS ROG Strix, MSI SUPRIM LIQUID
NVIDIA GeForce RTX 4090 Unboxed: FE, ASUS ROG Strix, MSI SUPRIM LIQUID![Storage Showdown - Intel Alder Lake vs. AMD Zen 4 Storage Showdown - Intel Alder Lake vs. AMD Zen 4]() Storage Showdown - Intel Alder Lake vs. AMD Zen 4
Storage Showdown - Intel Alder Lake vs. AMD Zen 4


